Okay, So a while ago I made this hat. She hasn't worn it much, because I don't really have anything for her that matches it. So yesterday I made a Fun skirt to match the hat! And here is how I did it!

First here are your supplies: Fabrics (I made the whole skirt from fat quarters), A elastic band for the waist, A needle and some thread, A Mat and Cutter, and The sewing machine. you will also use a iron or roller to flatten down the seams.

First you Cut out your main part of the skirt. I Measured mine from a skirt I had already made. You can measure with a skirt you have and just add 1/2 an inch for your seams.

Then you cute your ruffles. I cut mine at 2 1/2 inches. you can do them bigger for whatever size of skirt you are making. As for the length of the strips, I cut them about double the length of the width of the skirt. you can do less or more depending on the amount of ruffles you want.

Now, Take the main part of the skirt and sew the two side together, outsides together.

Then iron, or roll down the seams.

After That, I sewed the bottom hem on the skirt.
Now measure the elastic so you can fit is inside.

Sew all the way around the top, so that the elastic will fit. Make sure to leave about a quarter inch for the seam. And when you get around to the start of the seam stop about 1 inch and 1/2 so you can put the Elastic in later.

Take your stripes and sew them into a circle, so each 2 1/2 inch edge is sewed to another. Then fold about a quarter of an inch over and sew on one side of the fabric. This will be the bottom of the ruffle.

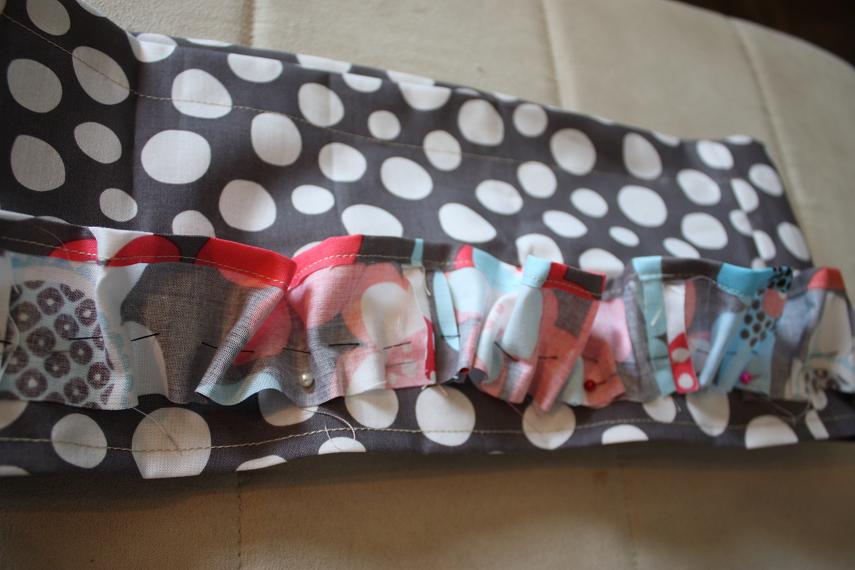
Take the needle and thread and gather as you fill is best. Then pin on to the bottom of the skirt with about 1/2 in left on the bottom. Make sure the ruffles are turned so the outside is touching the skirt and the hem is on top. so it is up side down. Like in the picture.

Sew along the edge all the way around then pull out the thread you used to gather.

Then Iron the ruffles so they are going down (like picture) and sew the ruffles down. Sew about 1/8 of an inch down from seam.

Repeat with ruffles about one inch about last ruffle. Add as many layers and you fill fit. Then Take the elastic (I like to attach a safety pin to help) and put it through the hole we left earlier until you have the elastic all the way through. Stitch the elastic, then stitch up the hole.

And Wallah! A Fun Spring Skirt for your little girl! Or for you!


 Then wrap some wire around them so they stay together, and just stick them straight into the tree.


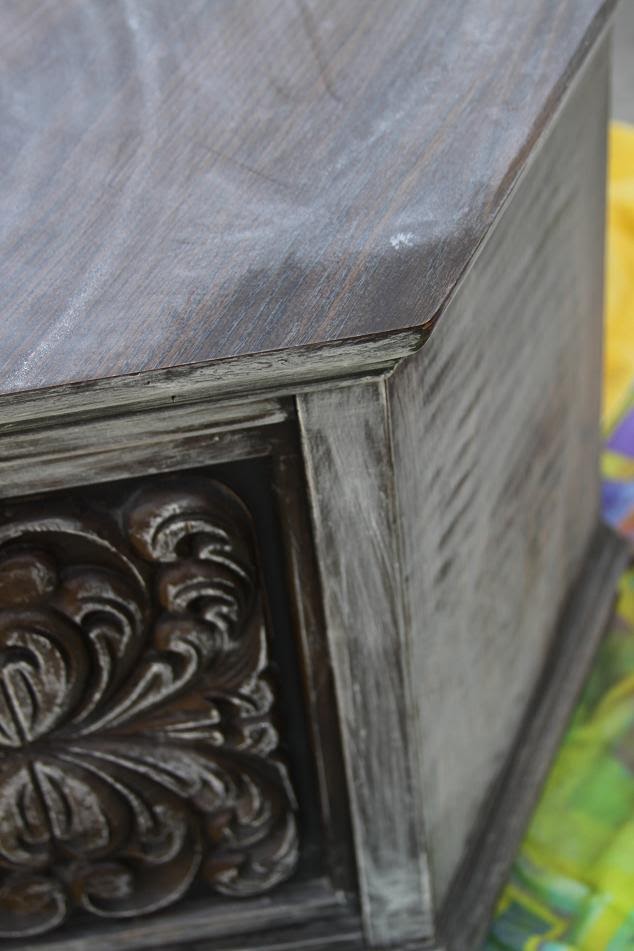
 After your Paint is dry you paint a glaze (Ralph Lauren glaze at home Depot for about 15bucks) over the piece, then wipe it off.
 Do a portion at a time. Paint, wipe, paint, wipe.... and so on...